Saturday, April 25, 2015

Technology As My E.A.

Help!

I recently had an educational assistant (E.A.) join my grade two class about 60% of the week. After about a month of having her in class she was away for two weeks. Despite her only being with my class for a short time, I already relied on her for the smooth running of my literacy centres. Each day students go to two centres. I have a large number of students who are working significantly below grade level and with behavioural issues. I truly needed her help and now she was going to be away for two weeks!


Technology To The Rescue

During reading centres I like to work with one group exclusively on guided reading or guided writing. I only leave my group briefly in the middle of each centre to monitor students' progress on the other centres (I sit where I can visually scan all groups regularly but I also like to do a walk-around once). Therefore, all the other groups need to be independent so that they are not interrupting my group. I do not want the independent work to be "filler", however. I want students to be engaged in meaningful work.

So, I decided to try increase the technology I use for centres to help me during my E.A.'s absence. My reasoning? Not only is it engaging but it could possible help provide immediate feedback on their work. Plus, if done correctly, I felt it would require little instruction from me. 

I already was using technology twice in my centres. Since September, students used tablets to access their RAZ Kids accounts. As well, students regularly accessed the computers to do word work activities (either from Spelling City or from interactive games/activities that related to the word work topics of the week).


OR Should I Say Google To The Rescue?


After searching ideas online and scanning many Pinterest boards, I did not find any pre-existing and free technology options that I felt met my needs. So I decided to make my own using Google Apps for Education products. 

Forms


The first tool I turned to was Google Forms. I used multiple pages along with the "Go to page based on answer" for multiple choice function to create a form that told students if their answers were correct or not as they worked on the form. They were directed to a video that reviewed "verbs" are if they selected the wrong answer. I taught students how they could select the "back" option once at the video to try again. 


I could see using this as a centre again, depending on the topic. It did not take much time to set up and my students were already familiar with forms, so it do not require a lot of instruction from me.

YouTube

I used YouTube for a making words station in a similar fashion as I used forms: I used it to provide students feedback on their work. I found a Notebook file I had created previously for a whole class lesson (I've been doing making words on the Smartboard for a long time, so I have many of these). Using Screencastify and a headset with a mic, I recorded a instructional video that I then uploaded to my YouTube channel. I put the letters needed for the making words lesson into ziplock bags and created a worksheet to record their work.

At centre time students took a bag of letters and a record sheet to a computer. As the video instructed, they'd make a word based on what they heard orally. Then the video would show them the correct way to make the word. I monitored whether or not students were just listening to the video and writing down the answers or if they were actually making the words along with the video. Only one or two students needed re-directing at the beginning of the centre.


I asked the students after how they liked the video/making words centre. Most gave it a thumbs up. A few mentioned that they found it too easy. So the following week I created two videos. I labeled each bag with a sticker to denote which level the letters belonged to.

I found this centre so successful that I have decide to keep it even with the return of my aide! I had always avoided having a making words (without technology) centre because students would not get feedback if they were making the words correctly until I looked at the record sheet a day or two later. Now that is no longer a concern as the video provides instant feedback. As it does take some time to make the videos, I will likely not use this centre every week.


Read And Write For Google


We had been working on adjectives and adverbs in language arts and learning how to revise sentences with them. So I decided to have students work at a "Super Sentences Centre". Each student was given their own copy of Super Spring Sentences (I used Doctopus to share). Students had to revise the writing by adding adjectives. Students who needed support got it with Read and Write For Google (RW4G). For those of you who are not aware of RW4G it is an extension that will (among other things) read a Google Document to the user. This meant all my students could work at this centre independently. In addition to having RW4G support them in reading the Document, they also had spell check to help them with the words they were adding. My students were familiar with how to use Google Docs and RW4G prior to this centre.

At the end of each round of centres each day, I read that day's Super Sentences creations on the Smartboard. This helps hold students accountable as well as show students how adjectives and adverbs can totally change a piece of writing. 

Like the making words videos, I liked this centre so much that I've decided to keep it in the regular centre rotation. The following week I modified it slightly for adverbs. As I create more "Super Sentences" centres I will share them on the Division One Collaboration Site For Educational Technology.

Not A Replacement

While having these technology centres helped bridge the gap while my aide was away, they are not a true replacement for an effective teacher or educational assistant. Unfortunately, there are many years when teachers have large class sizes with diverse needs and no funds to provide a human educational assistant when one is needed. Hopefully some of these ideas may help support teachers in that situation.


A Note About Access To Technology

To provide some context, I will share what technology I have access to. I have four desktop computers in class. As I have 25 grade two students in my class, most of my groups for centres are four to six students. So I use the computers as a centre but often need to use a netbook or two as well for large groups. Our school has 18 tablets. I currently keep six of them in class permanently as they are not used by others, at the moment. I also have easy access to a cart of 24 netbooks (yes, netbooks).  While these are not for my class exclusively, no one else uses them so I keep them in the room across from my classroom for easy access. Therefore I can have more than one group working at a computer-based centre.  

Friday, April 10, 2015

KidBlog: A Review


Kidblog Instead of Blogger


I have used a few different platforms for blogging with younger students. A few years ago, I settled on Blogger because it was apart of Google Apps for Education (GAFE) which I use regularly in class. The interface is similar to the other GAFE applications students use.

Last year I learned about KidBlog and was invited to participate on another classroom's blog. I was impressed by its set up, so decided to use it for my classroom blog this year. At the moment I am only using the free features. However, when my school finally gets Chromebooks, I may look into getting a premium membership as I love the fact that it has Google Drive integration.

Kidblog.org:
  • is free
  • is ad-free
  • is easy/simple
  • has Google Drive integration for premium members
The site motto is "safe and simple".


What I Like About KidBlog


FOIP Friendly

When students log in, they have a drop down menu to select their name from (I wish more sites did this). You can choose for each student whether or not their name is in the login list and blog directory. Those students who you do not want to be listed publicly can scroll down when logging in to "show all users" and then find their name.

When students who are not listed in the blog directory post, no one can see their posts on the blog. So students who may not be able to participate in blogging on other platforms due to FOIP can still blog but it is only visible to them and the teacher. 

You can have 40 users for you class with the free account. I add (safe) adults who I often ask to help respond to blog posts. However, you can have any visitor make a comment without needing a login, if you wish. You can also restrict comments to only being from users in your class and/or other users from other Kidblog classes.


One Blog, Many Bloggers

One of the things that I like is that all the students' blogs are centrally located. When you set up your class, you have one main blog. Then each student is a blogger within that blog. When you, as the teacher, do a new blog post, it shows up on the main blog site. When students do a blog post, it does not show up on the main blog site but on their own blog that exists within the class blog.

When you go to your class blog, you'll see the most recent teacher posts and then on the right you'll see a blog directory. The students' names are hyperlinked to their own blog.


What A New Post Looks Like

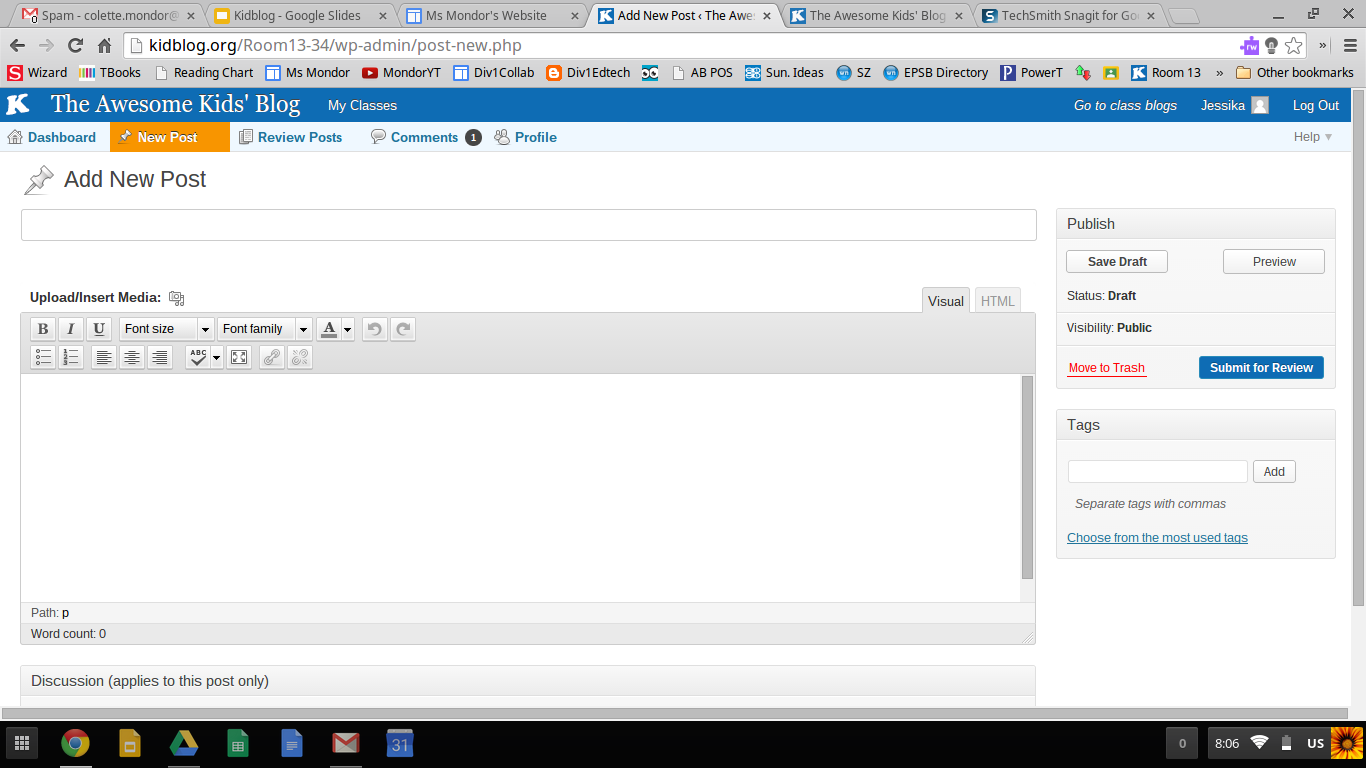
Their new post format is very similar to other blogging platforms. I wish it was a little more division one friendly. In general, students have minimal difficulties with composing new blog posts. Younger students will need help finding drafts and making edits on already posted blogs.


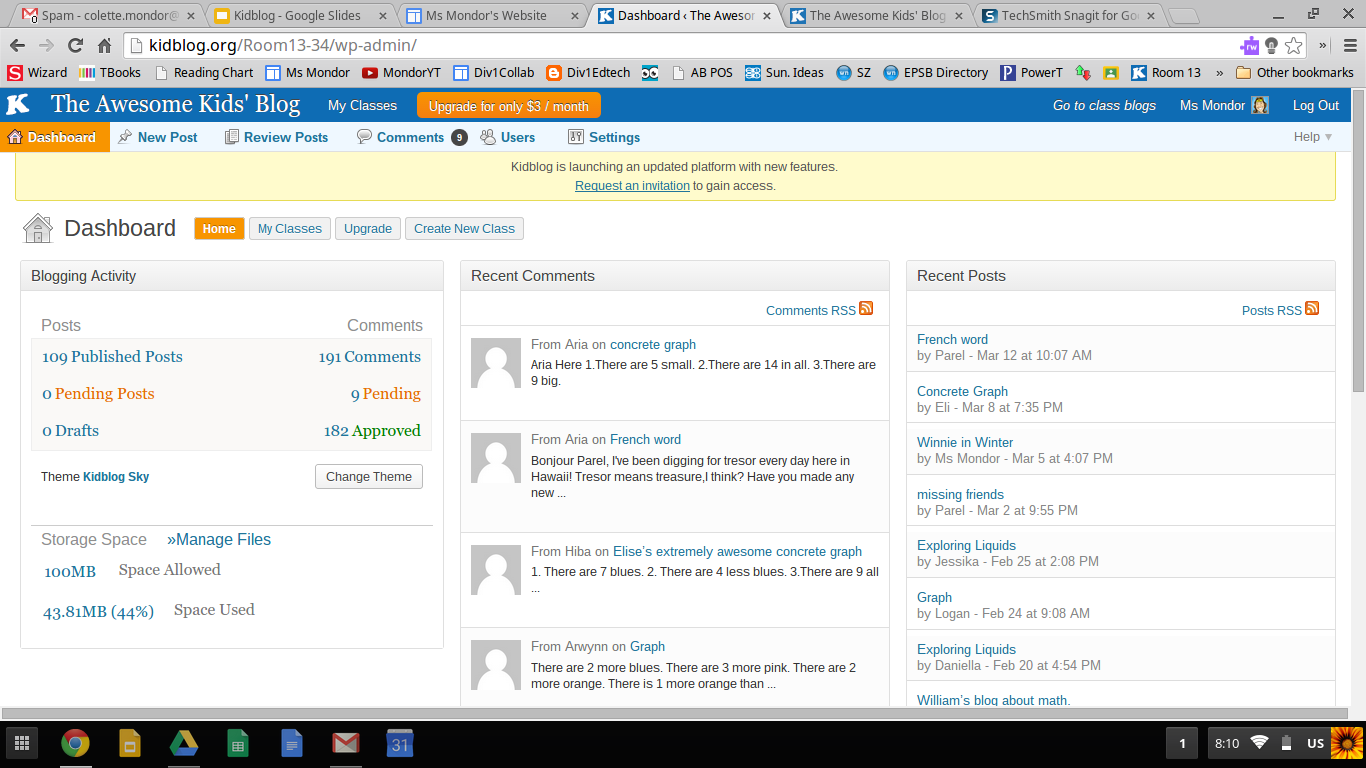
Teacher Dashboard

The teacher dashboard is well set up. You get a quick glance at if there are pending comments/posts that need your approval. 


Some Ways I Have Used It


Class Writes

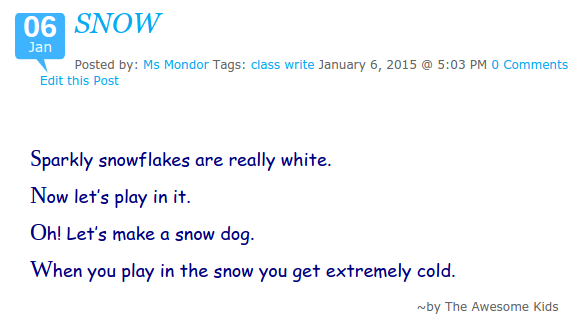
PDULI4I often model a form of writing prior to students doing their own writing. I give a purpose to these class write by publishing them on our blog. This also provides parents the opportunity to see what we are doing in class.


Commenting as a First Blogging Experience

Before letting students do their own blog, I introduce the site to them by having them learn how to comment. This year I posted a picture from a field trip and asked students what their favourite part of the field trip was. I like this as an entry point into blogging because it allows them to learn how to navigate the site without the extra complication of writing expectations. 


High School Commenters

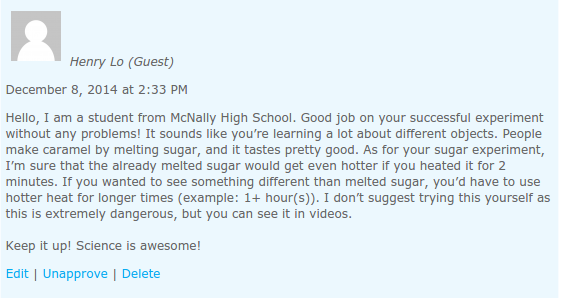
wDTzhWTo give my students the full blogging experience, I connected with a teacher in high school and arranged for his students to comment on our blogs. My students were excited to have a real (and older) audience. The high school teacher said his students found the assignment challenging.

I will say getting other classes to comment on our class and individual blog is a challenge. I use Twitter and G+ to try to solicit involvement, as well as emails to friends and colleagues.


kHguFB Student Created Math Problems and Answers


I won't go into this activity in great deal as I recently blogged about it. Students took pictures of their concrete graphs. These were then made into blog posts. Each student had to write math questions to go along with their picture. Then they each had to answer another student's blog/questions. 


Keeping Connected

I have one student this year who is moving temporarily to another province. She will be back for grade three. She is able to stay connected with her friends while she is away. She has posted twice now and the class has replied in the comment section. Her mom emailed me to say: She is super happy to be still in touch with her friends. Thank you Colette. Talk about writing for a purpose!


Suggested Reading

If you are interested in exploring Kidblog further, I suggest reading Blogging4Kids' posts on Kidblog.

Saturday, March 28, 2015

So I Joined Twitter. Now What?

A Division One Perspective on Twitter


I have had an education-focussed twitter account since October 2009. Colleagues who decide to create an account often say to me "So I joined Twitter, now what?" This questions is often paired with "how do you find the time to keep up with everything?" and "who do I follow". These are all good questions but none of them have a cut and dry answer, hence the long blog post.

This is a general post about why educators should be on Twitter and how to get started. However, it will have an EPSB and a division one slant.

Why Join?


In my opinion, often the best part of professional development days are the conversations I have with colleagues and friends. To me, Twitter provides that experience all year. As Max Cooke says in his article Twitter and the Canadian Educator: At their best, EduTweeters are adeptly leveraging Twitter to brand themselves, to reinvent teacher PD, and perhaps to accelerate the transformation of our Canadian education systems.


As well, I find being on Twitter helps me better see what is happening in the world in relation to education, not just my division, city, province or country. It provides me a window into the classroom of others. As George Couros re-iterates in a recent blog post: Isolation is now a choice educators make. Like many other primary teachers, I have not had a grade level colleague (in the same program) in the last three positions. However, I choose not to work alone.

As someone who uses Google Apps for Education with my students, as well as Kidblog, I sometimes have a need for people to comment on my students' work. With my Twitter (and G+) networks, I have a larger audience to do so.

Who To Follow?


So now I've convinced you to join Twitter, you need to find people to follow. Personally, I think variety helps make Twitter effective. If you only follow like-minded people, you risk creating an echo chamber. A variety of educators from across divisions, provinces and countries is going to provide you with a richer Twitter experience. Consider following some people who do not have the same educational philosophy as you.

However that does not answer the question of how to get started. The best way to get started is to look at who people you know are following. For instance, we could look at who David Salmon follows by going to his profile. At the top you will see how many tweets he has done, how many people he is following, how many people are following him, how many tweets he has favourited and how many lists he has created. Here is what I look for when I decide if I want to follow someone:
  • A profile picture. Do they have the default egg as a profile picture or do they have a custom picture? If they do not have a profile picture, they are likely not an active user or it could be a spam account.
  • An interesting bio. What they say about themselves? Select people who have write ups that interest you. I tend to avoid following people who are vague or have no bio, unless I already know them. 
  • Their recent tweets. Click on their handle/name. When was their last tweet? If it was over three months ago, they are likely not active Twitter users. Do their recent tweets look like ones you would like to read in the future?
If you want the relationship to be reciprocal, consider making sure the above three tips apply to you! Lurking on Twitter is valuable, but being an active participant is even more so, and to do that you need followers as well as people to follow.

Here's the full list of who I am following. Another good resource for Alberta educators is @shawnram's AB Educator list.

What To Follow?


Some people do not focus on following people. Rather they follow lists and/or hashtags or participate in Twitter chats. 

Lists


You can make your own lists or you can subscribe to other people's lists. When you follow a list, you see the most recent tweets from the users in that list. The blog post Teacher's Visual Guide To Creating Twitter Lists has step by step instructions on how to create a list. 

Here is a new list I have created for this blog post and hope to add to: Div1 Edtech. These are educators who work (or have worked) in K-3 classrooms. You can subscribe to lists that others have created. For example you may want to subscribe to the ATA's ABTeachers list or Rick Stiles-Oldring's EPSB list.

Hashtags


The pound sign, #, is a hashtag. In social media # with the words that follow are used in a few different ways. Primarily they are used to label the contents of a tweet (a Twitter message). They can also be used as a creative way to deliver a thought or add meaning to a tweet in a concise and dynamic way. When you follow a hashtag you can see the tweets from all the people who use it. If the idea of Twitter as a conversation interests you, then you may be more interested in following hashtags than people.

I typically I follow the hashtag of my district, #EPSB. Then I follow other hashtags based on my interests and activities at the time. For instance, during our local Teachers' Convention, I follow #GETCA as well.  That way I can have some backchannel chats about the sessions I am in or convention in general. You can use a Twitter client, such at TweetDeck to see many hashtags at once in real time. You can choose what you want each column to display. In the image below I was at an EdTech Google Summit (they use the hashtag #gafesummit). So I had TweetDeck set up to show:

  • my Twitter feed, the most recent tweets of the people I follow
  • my notifications, interactions on Twitter
  • two hashtags, as Max Cooke states, hashtags serve as hubs for scheduled or ongoing exchanges among peers


You can find a large number of hashtags for educators in the blog post The Complete Guide To Twitter Hashtags For Education.

Twitter Chats (Chats Using Hashtags)


Twitter chats are a great way to connect with other educators and to keep up on current education trends. What are they? A Twitter chat is a scheduled event... on Twitter. Typically they happen at the same time each week. They are usually moderated by one or two people who set the topic, set the questions and keep the conversation focussed. These moderators will keep the conversation moving by asking a new question every seven minutes or so. They also use a specific hashtag filter the conversation. The moderators will ask a question using the Q1 format (Q2, Q3 and so on) in conjunction with the hashtag for the chat. The participants will answer questions with A1 format (A2, A3 and so on), also with the hashtag for the chat.


I've been enjoying #abedchat on Wednesdays!

How To Keep Up? Think Of It As A Staff Room, A Global Staff Room!


Often new users find Twitter overwhelming. Initially people feel they need to "keep up" with Twitter. To me Twitter is like a staff room. When I'm in the staff room I am a part of the conversation(s) that happen there. When I am not in the staffroom, I do not stress out about what conversations I am missing. As well, I can go in and out of those conversations as time and interest allows. Twitter is no different for me. When I have time, I enter my global Twitter staffroom and engage in both lighthearted and deep conversations. I rifle through the articles left out for me to look at and read more about the things that interest me and disregard those things that do not. The difference with Twitter and my real staffroom is that if I did want to go back and find out what a Twitter conversation was about, I can do so at any time, from anywhere.

Your Turn! 

Please share in the comments your favourite people to follow, your must have hashtags and your tips for Twitter!

Monday, March 16, 2015

Concrete Graphs, Photos and A Blog Post

Concrete Graphs

In grade two, in Alberta, students need to "construct and interpret concrete graphs to solve problems." I typically have had students do this outcome as a centre. Students create a concrete graph and then ask others at the centre questions about their graph. I typically do this centre with students twice. What I have had difficulty with this outcome is having time to properly assess it. So I decided to look at how technology could support assessment of this outcome.


Photos

My first idea was to have students take photos of their graphs. This would allow me to capture their graphs quickly and assess them later. That way I could still move around the centre to assist students with their graphs or assist students in asking questions about their graphs. 

However, that did not address or capture the second part of the outcome: interpret concrete graphs to solve problems. 


A Blog Post

So, I decided that students could write a blog post (we already had a class blog) about their graphs and ask people questions. The second step of the activity would be for students then to answer their peers' questions. 


Steps

Step One: Construct Graphs and Take Photos

I still had this as a centre (there were two other centres and students were at each centre for about 18 minutes). As well, I still had students do a concrete graph centre twice. The first time was just practice. The second day was when I had students take their photos. This meant that I only had eight students needing to take photos at a time. This is a manageable number! I have access to tablets in my school. So I took four tablets for this activity. On the back of each tablet I taped on some paper. As students took their photos, they wrote their names on the paper on the back of the tablets they used and how many photos they took. This helped me keep track of which photo went with which student. 


Step Two: Uploading Photos

I uploaded all the photos from each tablet to a file on my computer I called "graphs" and I named each photo the name of the student. I then uploaded them all to the media library on Kidblog. This takes a little bit of time, but not a lot.


Step Three: Students Blog

Once the photos were in the media library, students could blog. I demonstrated to students how to access the media library. Then all students had to do was look for their name! Once they inserted their photo, they had to write a minimum of two questions about it. 


Step Four: Approve and Edit Posts

Before students could comment on each others' posts, I went through and approved each blog post. Some needed some editing before they could be published. I simply logged into Kidblog and had students do edits with me instead of having them log in, find their unapproved comment, edit, press update, etc. 


Step Five: Commenting

When all the blog posts were published, they were ready for the final step... commenting. I paired students up. Each student had to comment on their partner's blog post.  Students who finished early could comment on other graphs.


Step Six: Approve and Edit Comments

Just like step four, I went through and approved each comment. Some needed some editing before they could be published. And just like step four, I did that by logging onto Kidblog myself and had students work with me one-on-one in a quick conference to make necessary changes.


Step Seven: Assessment

With my rubric in front of me, I logged onto Kidblog and assessed both parts of the outcome that started this adventure: construct and interpret concrete graphs to solve problems. 


Problems Along They Way

The biggest problem that I ran into was during the photo stage. Students sometimes bumped their graphs and so their objects moved and no longer lined up on the graph paper properly. Some students did not do quality work and I did not notice until the photo was taken. So many students had to fix or redo their work and retake the photos. If I were to do this again, I would address this issue with students prior to starting the project and be more diligent in checking the graphs before students took the photographs. 

I had actually hoped to also get other people to interact with each student's blog post but I couldn't find any takers. 

Glare was also a problem as their graphs were on laminated paper. We ended up turning off some of the lights to help mitigate this problem. 


Reflections

I liked this assignment. It definitely required more work from me than my previous centre activity. However I think it increased the amount students were engaged in thinking about what the graphs show and not just constructing them. I would definitely do something similar again. The photos did use up about 40% of my storage space on Kidblog (free account). 

I would like to have the activity have more real life relevance (a real problem for them to solve) or purpose but I have not come up with what they could do a concrete graph for to address that. . . yet.

Wednesday, February 25, 2015

5+5 Great Division One Art Sites

We often don't really think of digital art for younger students, other than maybe making a card using a computer program such as MS Paint or Google Drawing. However, there are a few sites you may want to bookmark. Here are some websites for your consideration:


Five Sites Where You Can Easily Print What You Make

  1. ArtPad - A virtual canvas (good for Pointillism).
  2. Build Your Wild Self - make a digital human that has animal characteristics.
  3. Interactive Art at the Chicago Institute of Art (choose play with art, then mask maker)
  4. Make-A-Flake - A Snowflake Maker (there are a few clicks needed to be able to print)
  5. NGAkids Art Zone (you need Shockwave) 

Five Sites Where You Cannot Easily Print What You Make But Are Fun

You could print from your browser and print the screen for the sites below. Some of the following websites have ways to save and then print. However these would require a lot of steps that may make printing with younger students challenging. So just enjoy having your students creating!
  1. Jackson Pollock - make your own abstract Jackson Pollack painting by simply using a mouse.
  2. Picasso Head - make your own Picasso portrait. (you can email/save your creation and use your browser options to print)
  3. 3D Snowflake Creator
  4. Virtual Lite-Brite
  5. Zoopz Mosaic Builder

    Wednesday, February 18, 2015

    Digital Kids, Digital Storytelling!

    Tell me a fact and I’ll learn
    Tell me a truth and I’ll believe

    Tell me a story and it will live in my heart forever

    Why use Digital Storytelling?
    • Engagement: digital kids live in a world of sound, images and text
    • Student choice: allows for all learning styles to be addressed
    • Critical thinking skills: matching sound and images to text


    When to use Digital Storytelling?

    ANYTIME!

    • Show What You Know in...
      • Social: Explore a province, Edmonton, etc
      • Science: Show the water cycle, life cycle, circuit
      • Math: Explain how to add,subtract or how to use a graph
      • Health: Show healthy foods
      • LA: storytelling, retellings, book reports


    Using Digital Storytelling with Division One:

    Kindergarten: For kinders, digital storytelling is best done by the teacher using student input. Check out this video using student created letters for the ABCs. Consider taking pictures of student work and uploading it to Animoto. It's a great tool for conferences!

    Grade 1: Digital storytelling in Grade 1 can follow the same idea as kinders at the beginning: the teacher uploads student work and creates the digital story. As the year progresses, older buddy classes can support Grade 1s as they develop their own digital stories. Here is an example of a collaboration between Grade 5 and Grade 1 on Edmonton Landmarks. Once this collaboration was done, the Grade 5s assisted their buddies to create another Google Slides on All About Me. Eventually, the Grade 1s were able to create their own set of Google Slides with minimal support. 


    Grade 2: If your Grade 2s don't have any experience in digital storytelling tools, then a buddy class can support them as for the Grade 1s above, leading them to independence in developing their own stories. 


    Grade 3: By Grade 3, your students are very capable of being shown and supported in creating their own stories! 


    Beginning with Digital Storytelling:

    I always suggest that you are best to start with a simple project, such as All About Me, when teaching students the use of a digital tool. Remember, you are teaching the use of the tool, not the subject, when you first begin. Once students have used the tool, they can focus on curricular objectives. A popular topic is polar bears. We find one image and use the Online Reference Centre to find one fact, create our digital story and share.


    Tools for Digital Storytelling:

    Brainstorming:

    Brainstorming tools can be as simple as your whiteboard and a marker, or can be digital. Here are some digital tools that you can use as a whole class or individually in Grades 2 and 3. 
    Popplet: Mindmapping: can be printed or exported as a PDF
    Padlet: Online sticky notes
    Webbing: ReadWriteThink’s online webbing tool

    • Upload images, write short bits of text and add music to create a moving slideshow
    Animoto is a tool best introduced with a buddy class who has used it before. I have used it with Grade 3's after March, and they were able to use it, however, I had a parent volunteer who I had trained in its use help me when I first showed students how to use it.


    Voicethread:
    • Collaborative, multimedia slide show that holds images, documents, and videos
    • Allows people to navigate slides and leave comments in 5 ways - using voice (with a mic), text, audio file, or video (via a webcam).

    Voicethread is best used as a teacher-driven form of digital storytelling. Students can create the artwork or take the pictures, and then, using a microphone connected to the computer, narrate their story or verbalize their learning. Ways to use Voicethread in the classroom:


    • Document your last field trip.
    • Have students create a story to show their learning.
    • Use it to build a collaborative understanding of a specific image or story.
    • Grade One Voicethread on mini-legends

    Google Slides

    As a Google Apps district, Google Slides are easy to access and use with students as it is part of their student account! Once again, this is a tool that would be best introduced as a buddy activity if you want your students to create individual stories. Once they are used to it, they will be creating their own slideshows at home and sharing them with you!
    • Slideshow tool that uses pictures, videos and text to tell your story
    • Students can create their own presentation or can edit one slide to create a classroom presentation
    • Alternative to Powerpoint if you want students to work from home
    • Can also be downloaded as a PowerPoint if necessary


    Little Bird Tales is not a free site, although you can get a free personal account. With that account, you can create class stories. If you want to have an account for your whole class, it is $25. However, Little Bird Tales is wonderful for students who are in Grade 1, as it doesn't require that students be proficient readers in order to create a story.
    • Walks younger users through each step of creating a multimedia story
    • Can upload images, draw images, or record from webcams
    • Can use text or narrated by students using microphones
    • Free lesson plans on the site


    StoryJumper is a free site for teachers and students. They make their money through selling hardcover copies of student work. StoryJumper is wonderful for students who are in Grade 3 and students and parents who want to create stories together at home. Teachers can create classes through the Classroom Edition, and use the Story Starter Guide to get students started.
    • Gives students a set of intuitive tools for writing and illustrating their stories
    • Can also read other stories by students online
    • Pre-made scenes and props, or upload pictures and use students' own artwork
    • Can create your own classroom, allowing students the opportunity to work on Story Jumper at home
    • I Have Many Feelings: Book written by classroom teacher

    Back to....Beginning with Digital Storytelling:

    Digital storytelling can seem overwhelming when you are looking at a class of Division 1 students, many of whom struggle with story writing at the best of times. Think of the gift you are giving them...the understanding that a story does not ALWAYS need to be told with a pen and paper. Once they can use the technology, you are setting them free to use the higher level thinking skills that come with storytelling.
    Review the resources on this page and CHOOSE ONE. Choose one that you are comfortable with and play with it yourself. Then introduce it to your students. Bring in any parent volunteers you can or buddy yourself up with another class or teacher. You will find the time and effort worth your while!


    More Resources
    There are far more ways on heaven and earth to tell a story, Horatio! (Shakespeare as mangled by me!)